Now I love bright eyeshadow, but if you're not really that invested in making some of the more complex layered looks that I like, that's perfectly fine. You can still get a lot of glam out of a little effort. Let's begin shall we?
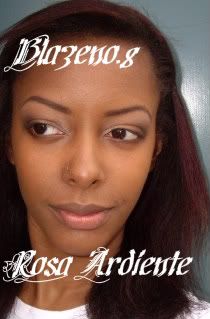
So take this look. This is what I would assume that some people do: Apply foundation, eyeshadow and mascara. You're good to go right? Well sure, but why not take it up a notch?
Start by working with eye liners. There are many types of eyeliners: gel (L'Oreal Hip/MAC Fluidline), pencil, liquid, and eye khol. I like all of them, but for different reasons. In fact most times I use a mix of liquid (upper lid) and pencil (waterline, tightline, lower lid).

Step 1: Put black pencil eyeliner on your waterline and tightline. This will give a fairly completed tied in look to the eye from my point of view. Rarely if ever do I skip this step. Make sure whichever eyeliner you are using for this is approved for that area. Waterproof eyeliners are *not* safe to put here.

Step 2: Liner your upper lid. You can use anything you want for this, I love liquid liner for my upper lid. I decided to wing this one out.
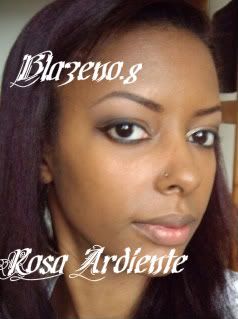
Very nice. That looks a little better than what we started out with. Now let's do something about the fact that even with mascara I have short and stumpy lashes.
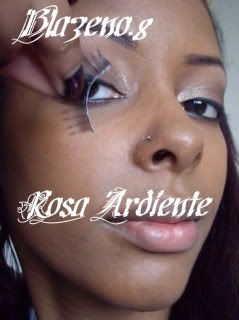
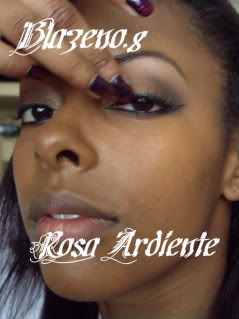
Step 3: I'll add false eyelashes. If it's your first time doing this, you can use clear eyelash glue. This way, if you have to correct anything, the glue will dry clear. Much better than black glue. I would only suggest getting the Duo Adhesive kits if you want a kit. A little pricey, but it's a good glue. It has nice hold and it's easy to take off when you want to. I haven't lost any lashes to it yet ;)
Here I'm using my black glue. Get it along the edges of the lash band and let it dry for 15-20 seconds. After that, line up the lash band with your natural lash line and lightly place the band on the skin, not the lash. The best way to do this is to use a hand-held mirror and look down. Afterward, I adjust the lashes with my fingers, pushing it slightly closer to the lash line as needed and holding it down in some places to get it to stick. If it moves a bit, the black eyeliner that you put down earlier should help hide that.
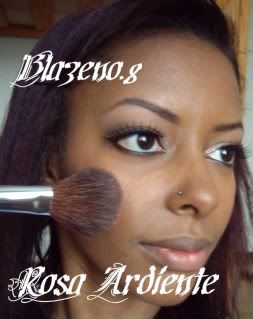
Step 4: The eyes look nice, but the skin and lips are kind of drab. I added a blush/bronzer combo to my cheeks.
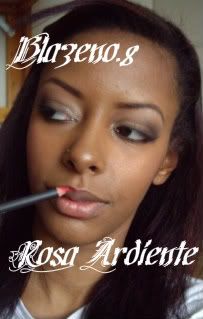
Step 5: Now that things are looking better, the quickest way to quick glam is to draw attention to the lips. I'll go for red lips. I take out a red lip liner and draw a "V" in my cupid's bow. I also drew a line at the bottom of my lip. I finish the outline by connecting these lines and not forgetting my corners (it's so obvious if people skip this step).
Step 6: Finish filling in the lips.

Step 7: I applied my favorite red lipstick over it.
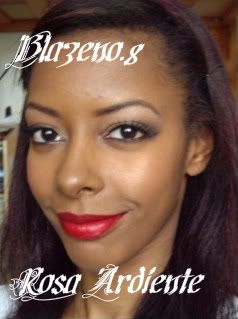
Step 8: I love lipgloss and think it can take your look to the next level. I applied the gloss to the entire lip.
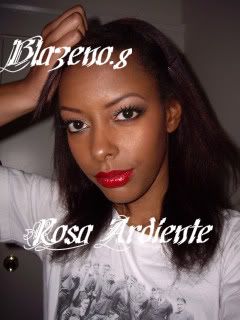
And voila! There you go.
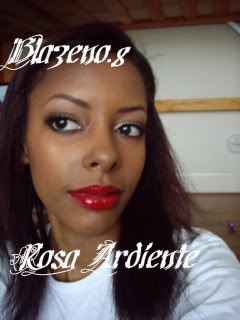
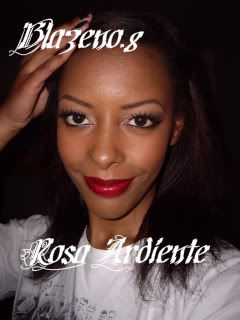
With flash:
There are many different kinds of red, so you can feel free to play around. This is the same lipstick and liner with a different gloss formula and is a darker shade than the first one I used.
I also like taking red lip glosses and putting them over black lipstick, but we can save that for another day ;)
LOVE.
ReplyDeleteThis was a great tutorial, Roslyn! (I like the detail; I've seen a lot of pretty vague ones, which doesn't help when you're trying to learn.)
Well I realize that I can't show that much with pictures in respect to the eyelash application, so I'll try to upload a video or something. My biggest problem is lighting and since most of the days are overcast, that hasn't been helping.
ReplyDeleteI think my camera also becomes borderline when I'm recording. At times it wants to give me plenty of time, but other times it's like "You again? I've had enough of you... ending recording session... Now."
Me encanta!!! tengo mucho maquillaje pero no sé usarlo!! pero hay algo que no entiendo, no sé que diferencia hay entre waterline, tightline y lower lid.
ReplyDeletetengo un pedido (request) pronto viene el carnaval y llevo este difraz http://www.hollywoodtoysandcostumes.com/cached/15FW5139.jpg
algún maquillaje que recomiendes??
Ju
Ju,
ReplyDeleteQuiero celebrar Mardi Gras aqui! ^_^ Voy a pensar en algo para ti... pero hoy alguien agarro mi bolsa que tenia mi camera y por eso no puedo poner fotos nuevos (tengo fotos de ayer que voy a poner, pero creo que la mayorian seran de colores vivos para los labios). Voy a ver si un amigo mio tiene un camera, pero si no, solo puedo darte unas recomendaciones sin fotos.
Tengo una idea para tu maquillaje. La mujer que tiene mi bolsa llamo a mi mama y va a devolvermela manana. Puedo intentar en encontrar alguien para demostrar lo que he planeado.
ReplyDelete